
Capture your home’s best angles with lighting, camera position, and editing tips from a top interior photographer.
Meet our expert Elyse Kennedy is a Belfast-based professional photographer who captures stunning architecture, interiors, and the built environment. Her editorial-style imagery has featured in magazines like Grand Designs, House & Home, Ireland’s Homes Interiors & Living, and Perspective.
Great interior photography is about more than simply snapping a room, it’s about capturing the vibe. The right shot shows off the charm, style, and soul of a space, inviting people to picture themselves right at home. Whether you’d like to know how to photograph your home to draw in potential buyers, or to create enviable insta house inspo, learning how to take great photos is well worth the effort.
To find out how to elevate interior photography from good to great, we asked Belfast-based architectural, interior and lifestyle photographer Elyse Kennedy to reveal her top five tips. Read on for your speedy guide to interior photography.
1. Make the most of natural lighting
I always prefer to photograph interiors using just the natural lighting that is available. Time of day and the position of your room/home can affect the result you get. It’s best to shoot a space when the sun isn’t streaming through a window as this can create harsh shadows and highlighted areas that can be hard to balance out when it comes to editing.
2. Nail your camera position
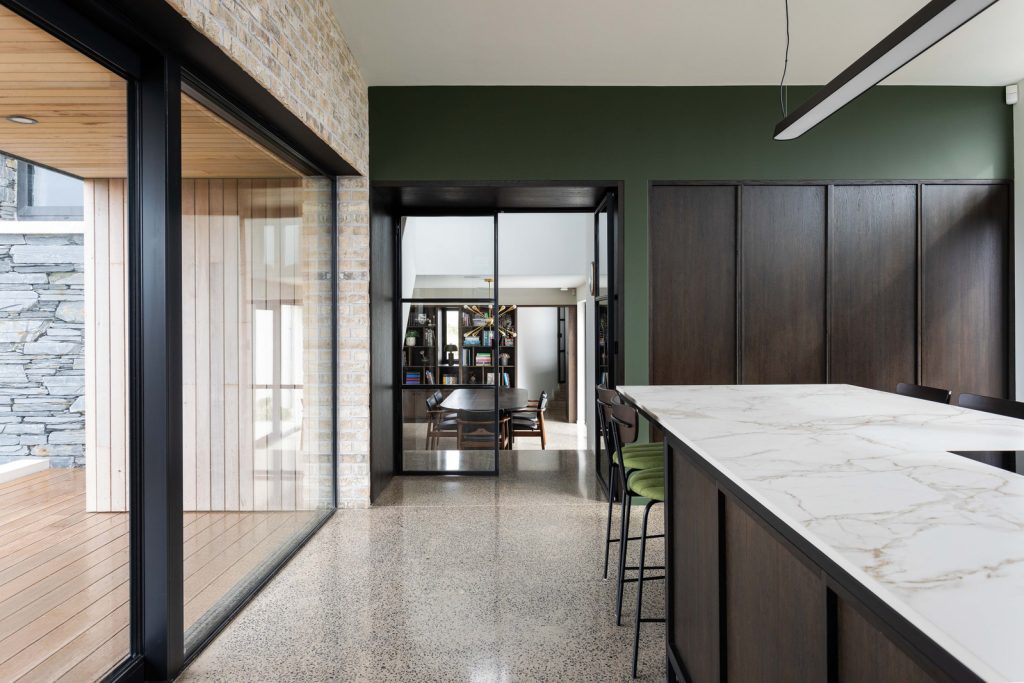
To get the most accurate representation of a room, it’s best to shoot around lower chest height. The aim is to create equal floor and ceiling height with the rest of your room or selected area in the middle of the image. This way the room won’t appear too top or bottom-heavy.
3. Master the art of angles
My favourite way to photograph a room or an area of the interior is to photograph it straight on. You can use the guidelines on your phone or camera to make sure everything is lined up and as straight as possible, and this way you won’t get too much distortion.
You can always straighten things up further when you go to edit your images, but if you take a few extra seconds before taking the photograph you’ll find that you won’t need to do too much in post-production.
When photographing from an angle, try zooming in on your subject slightly, so that the room doesn’t appear unrealistic in terms of size/ appearance.
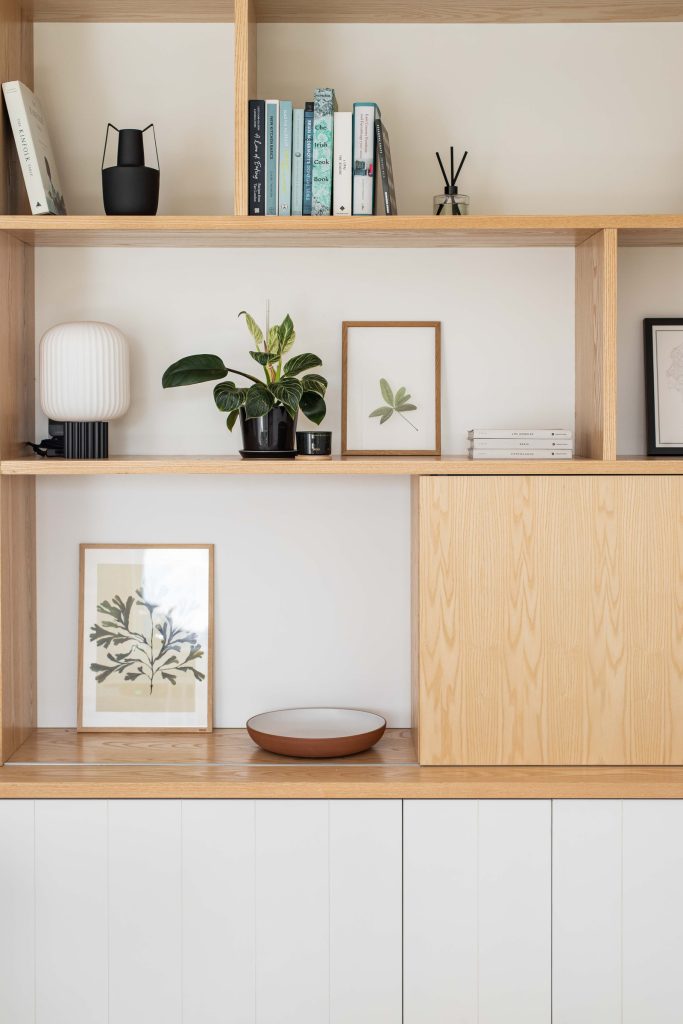
4. Highlight the little details in small spaces
When photographing smaller spaces I like to focus more on details or certain areas within that room. Avoid squeezing yourself into a corner and trying to get the whole room within the image as it can look unrealistic and distorted. Shooting straight on is best for smaller spaces.
5. Edit to perfection
My favourite way to edit on my phone is by using the Lightroom app. However, if you don’t have this or don’t want to pay for it, then there are a whole selection of free editing apps available to download. The editing tools available through Instagram are great and offer a good range of editing options to get the best out of your image.

For interior photography, I don’t like to go too heavy on the editing. Instead, I prefer to keep things looking more natural and how they would in real life. Typically, I increase the exposure (making sure to not overexpose any areas), reduce highlights, remove shadows slightly, add some contrast and sharpen.
Depending on the style of the room you’re photographing, you might like to desaturate the image a bit too. This isn’t an extensive list of everything you can do to the image to get the best out of it, but they are some good starting steps to play around with.